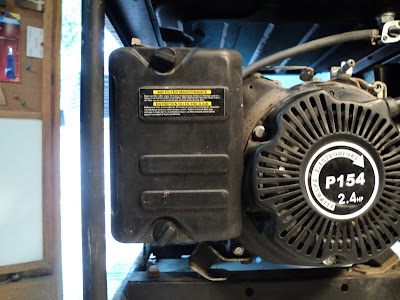
Well, what have we here?
A garage sale generator that my son just brought me. Let's get it up onto a work surface for a better look.
That's better. Here's a view of the I.D. label.
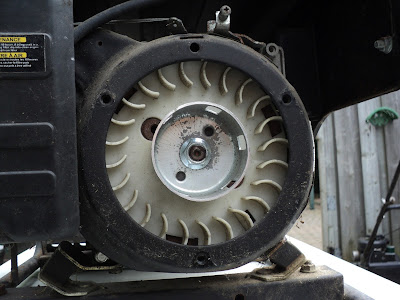
The machine has issues. The recoil starter's cord is completely unwound, and won't rewind. The carburetor leaks fuel like mad whenever I turn on the fuel supply valve at the fuel tank. I'll tackle the recoil starter first. Here's what I have to deal with.
This should be fairly straightforward. I'm hoping that the trouble is just a starter failure, and not an indication of a seized engine. If the engine is seized, the machine is scrap metal.
- - -
'Looks like a 10mm socket wrench should get those three fasteners off; then I should see something instructive under that starter cap.
- - -
The good news is that the engine is not seized. I can turn the crankshaft, and there is some compression, though not a lot. I suspect that this engine has more than a few hours on it.
The bad news is that the starter is a broken piece of wreckage.
One of its pawls is out entirely. There are a few shards of plastic.
'Time to get the starter inside the workshop, and see if I can salvage it. I don't see a maker's name on the engine anywhere for me to go to the local small engines place with, to enquire about a replacement starter.
- - -
I managed to get the starter operable with only one of its two pawls, so the engine now has a working starter. 'Too bad it won't start.
Spark Plug
It does have spark. The spark plug appears to be some Chinese make; it's a BONON E6TC, 13/16" hex, approximately 0.025" gap. There was some carbon build-up on it. I cleaned and filed the electrodes and re-gapped it, and it looks pretty good.
Note the poorly centred centre electrode. That doesn't inspire huge confidence in BONON's quality control.
I took the spark plug with me to Canadian Tire, and the parts counter guy there was able to cross-reference it to a Champion Copper Plus L87YC. So now I have a new spark plug for the engine.
Air Cleaner
The air cleaner's cover is held on by two M5 wing screws.
Directly under the cover is a foam filter element, and in behind that is a baffle plate. The foam element is supposed to be oiled. Mine had never been oiled.
Note the orientation of the baffle plate. Behind the baffle plate are two 10mm A/F flanged hex nuts. Those two nuts fasten the air cleaner body and the carburetor itself. With the two nuts removed, the air cleaner body can be pulled off. Note that a crankcase ventilation tube plugs into the rear of the air cleaner body.
Carburetor Removal
With the air cleaner body off, the carburetor's governor link and spring must be disengaged from the throttle lever.
The spring's end unclips fairly easily. The link's end must be forcefully lifted out of its hole. It's ok to flex the link at its centre to help with disengaging it. Here's a view of the carburetor off the engine.
It's a fairly straightforward carburetor to dismantle. A 10mm A/F screw at the bottom of the bowl must be removed to get the bowl off; from there, the rest of it is pretty obvious. Following are some notes on the carburetor, in no particular order:
- The screw at the bottom of the bowl looks like a mixture adjustment, but it's not. It's just a drain screw for the bowl.
- The pictured carburetor had sat idle for a long time with old fuel in it, and had acquired deposits inside that had clogged the orifice supplying fuel to the main jet's well. The orifice had to be unscrewed and thoroughly cleaned. Deposits had also fouled the bore that the fuel inlet needle valve resided in, and possibly fouled the main jet's air bleed passageway. I soaked the carburetor's body in lacquer thinner for over an hour to clean it out.
- The fuel inlet needle valve seems to be prone to bind in its bore, leading to severe fuel leakage from the carburetor. It seems like you have to find a 'sweet spot' in the valve's installation orientation where the valve moves smoothly, and works reliably.
- Float level is fixed; it's not adjustable.
- There is no mixture adjustment for wide open throttle operation; that mixture is fixed.
- The single mixture adjustment screw is for partial throttle operation. Note and record the number of turns that it takes to close the screw before removing the screw. On my unit, it was just a little over one turn.
- - -
Conclusion -- THURSDAY, NOVEMBER 15, 2018
This has not been one of my better posts. I've done a poor job here.
Anyway, I got the machine working more-or-less satisfactorily. It still does a bit more surging at times than I care for, but it's adequate as a job site generator for powering most electrical power tools. Following are some takeaway points:
- A replacement starter was obtained from Ebay. It fit and worked fine. The starter design on these generators is not what I would call 'robust'. It's no surprise that the original starter had failed. To guard against starter failure, one should pull the cord gently until the pawls engage, and only then yank hard. Hard engagement of the pawls is what breaks the starter.
- A replacement carburetor was obtained from Ebay. It fit and worked ok. The engine doesn't have a great cold starting characteristic. Why these these things aren't fitted with a primer is a mystery to me. A primer would make for a much better cold starting characteristic.
# # #
# # #


Could you post a link to the recoil starter you found? I have the same generator and can't seem to find one.
ReplyDelete