* * *
[Part I of this post is here.]
* * *
The Governor/Throttle-Cable Linkage Plate
The plate is attached to the top of the intake tube with two 5/16" hex head screws. There's a throttle cable connection and a governor connection.

Here's the underside of the plate with the throttle cable disconnected.

Note the kill switch, and the governor's additional connection to the carburetor's throttle lever.
The throttle butterfly appears to be seized. This carburetor may be in rough shape.
- - -
The Carburetor Off The Engine

Note that the carburetor fastening screws are fine thread -- 1/4"-28.
- - -
The Carburetor Apart
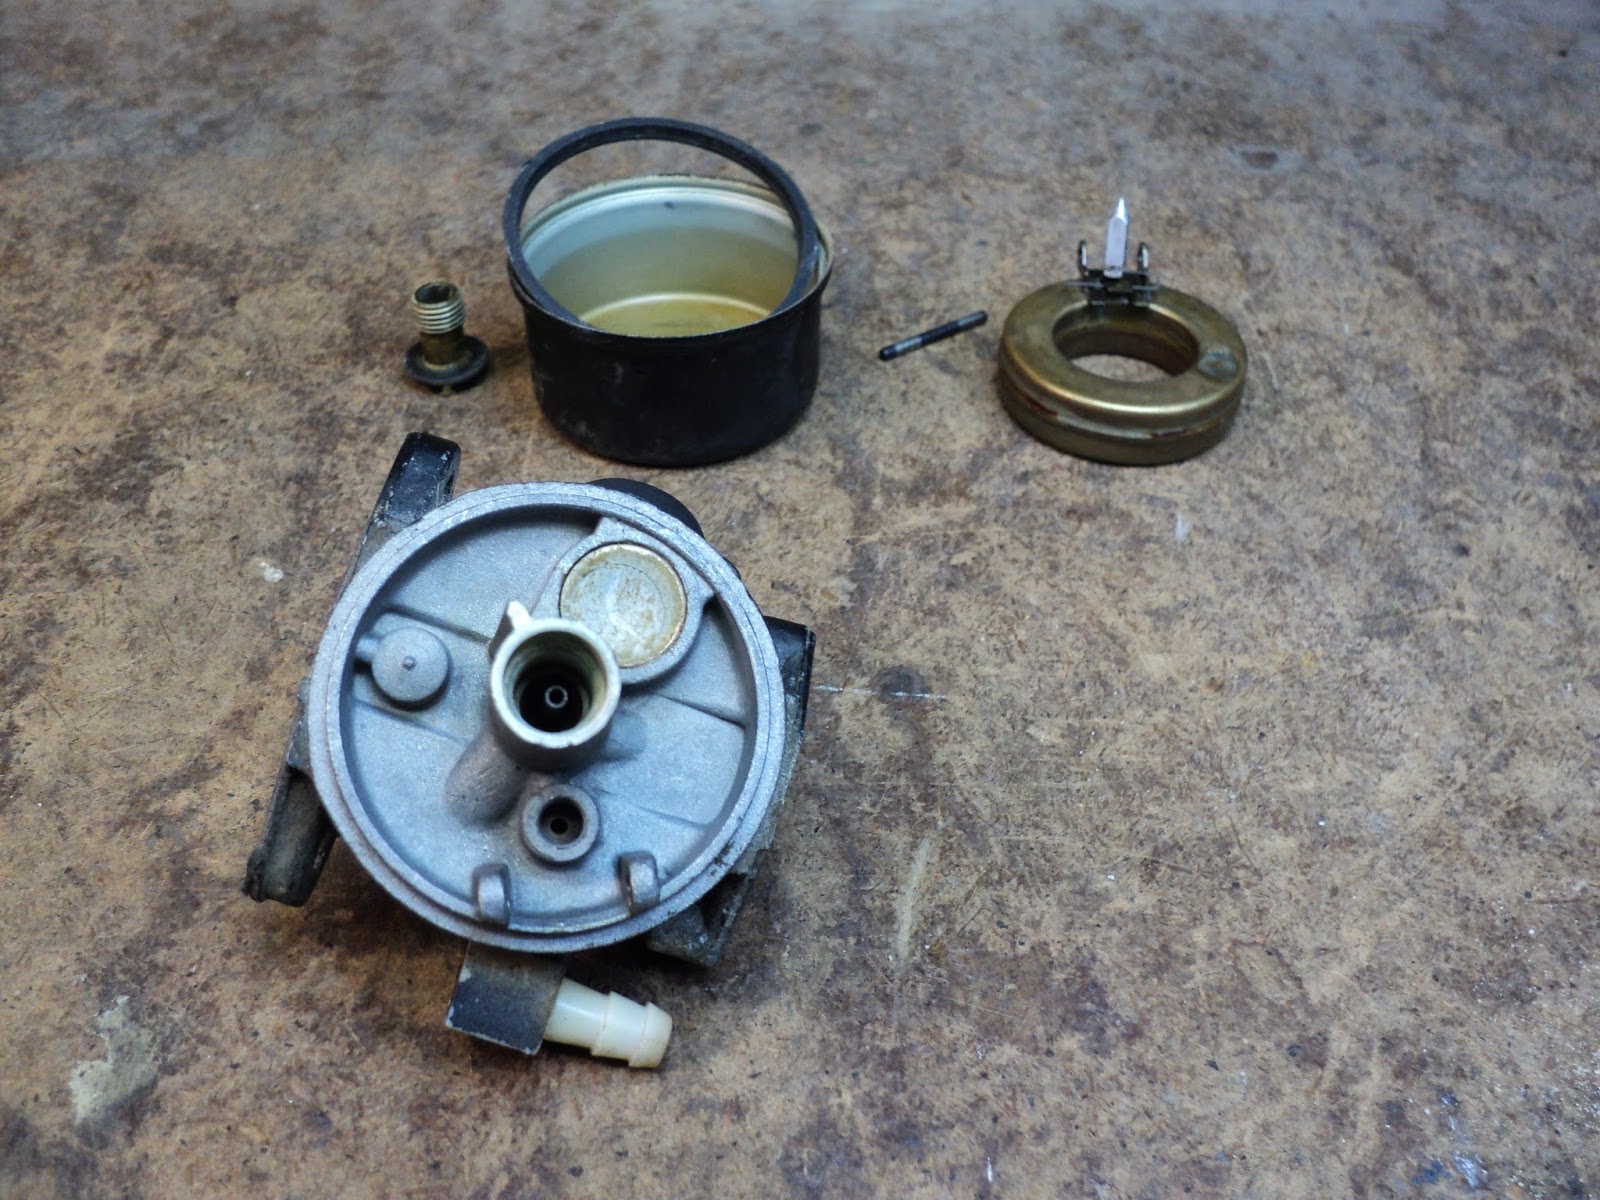
I haven't disturbed the needle valve seat or the primer bulb -- they both look ok. The 5/16" I.D. fuel supply tube will have to be replaced.

The throttle butterfly is seized open. I wonder if that was the 'last straw' that sent this mower to the side of the road.
I'll get the throttle freed up, and the entire carburetor cleaned. I'm nearing the point where I can reassemble the engine components and try the engine out.
- - -
The Sparkplug
The spark plug is a Champion RJ19LM, 13/16" hex. It's almost immaculate; it was probably replaced shortly before the mower was junked.[1]

I just tweaked the gap a bit to give it a snug 0.030". There's no need to replace the plug that I can see.
- - -
The Chain Drive

Removing two fasteners permits the drive cover to pivot upward, affording access to the drive chain. I'll take the chain off and leave it in the parts washer for a good soak while I get the engine taken care of. Once I get the engine running, I'll attend to the rear wheel drive.
- - -
It Runs!
The engine started on the first pull; it runs nicely. Now I just have to get after the grey engine oil, the blade and the chain drive. I'll have a nice old brute of a rear wheel drive lawnmower.
- - -
The Blade
The fasteners are 1/2" and 9/16" hex. The blade fastening arrangement looks like this underneath.

(Note the 3/4" hex oil drain plug near the 'top' of the crankcase.)
The two smaller (5/16") screws came out fairly easily. The 3/8" bolt at the centre was really tight. When you run into that, brace the blade against turning with a piece of 2" x 4", like so.
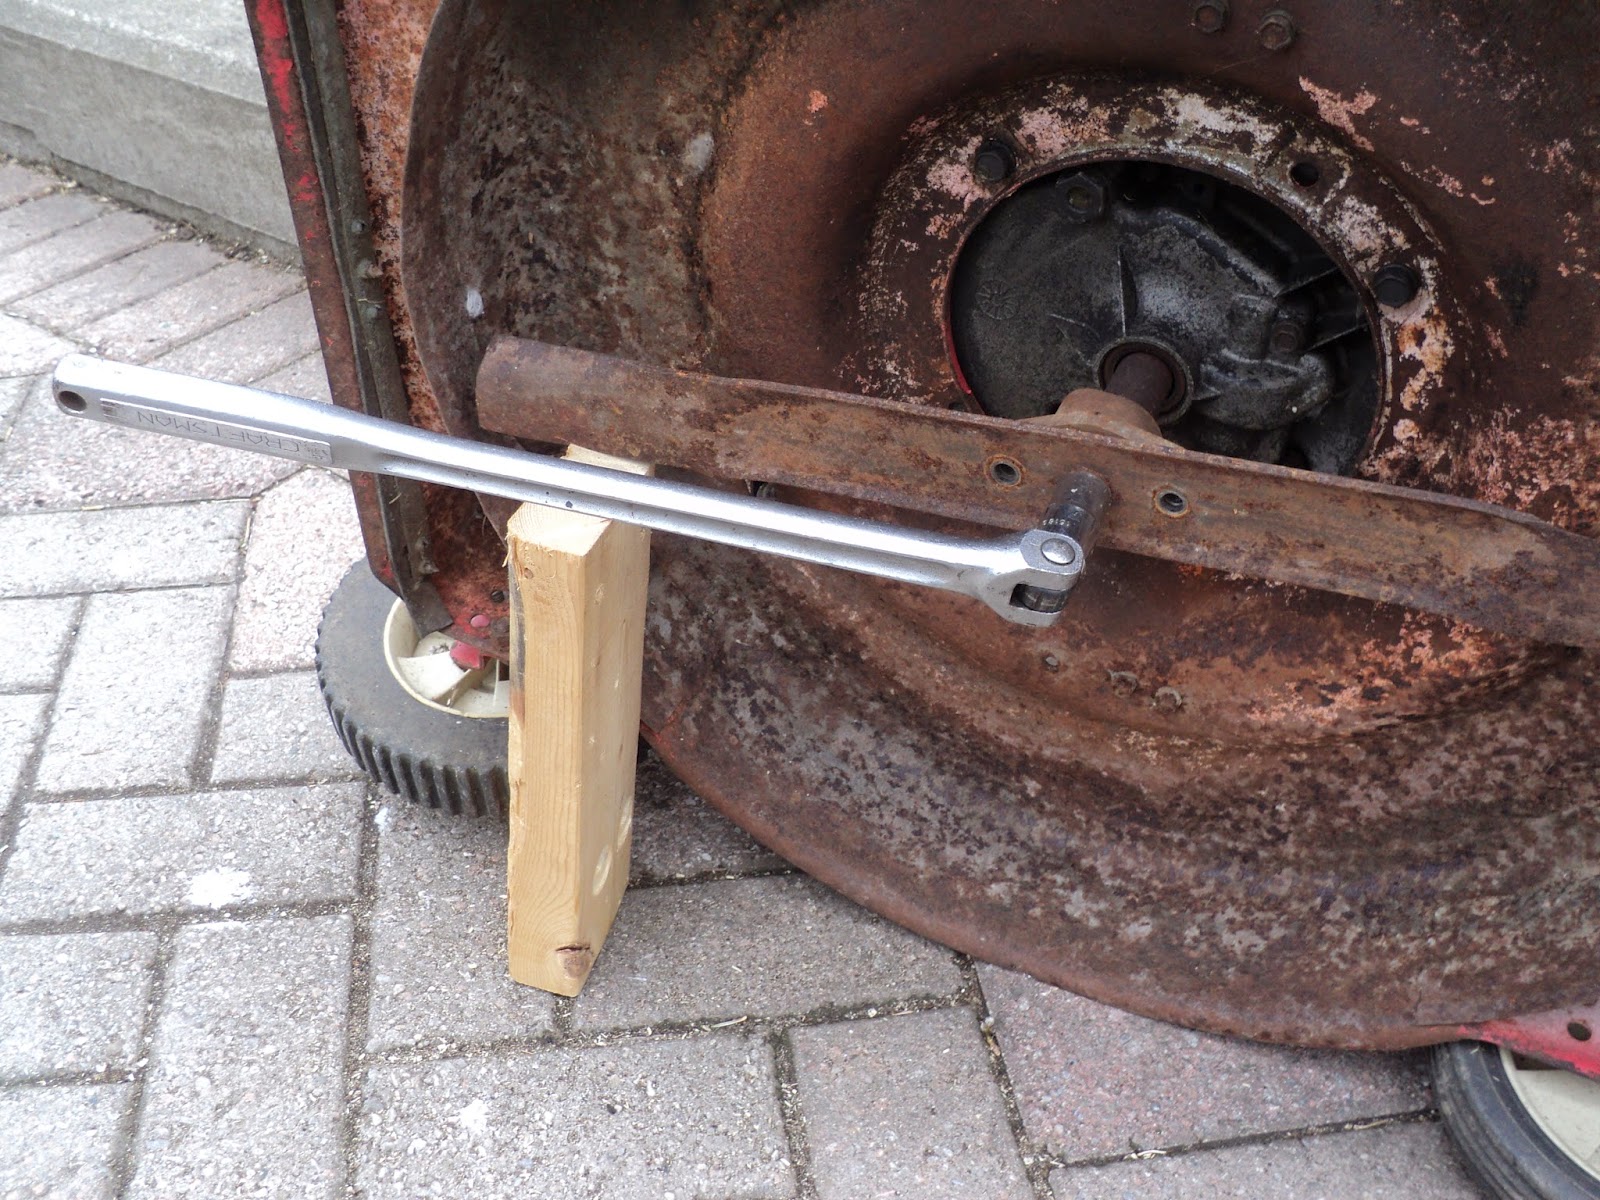
That worked fine.
The blade is not in too bad condition. It's not been used to mow rocks, as some blades appear to have.

A few minutes with the belt grinder will have that back to a decent state.
- - -
Here's the blade ready to go back on the mower.

I'm not the greatest lawnmower blade sharpener on earth, and I don't try for a fine, knife-like edge. A reasonable approximation of a cutting edge is good enough for a rotary mower, and that's as much as I try to achieve.
- - -
A Slight "Whoops!"
Setting the machine on its side for blade removal did not agree with the carburetor. The carburetor drooled fuel, and the engine got flooded something awful. It might be a good practice to drain the fuel tank, and run the carburetor dry, before setting a mower on its side for blade removal.
- - -
The Roller Chain
The roller chain[2] is in pretty good condition -- entirely fit for use.

I'll get the chain back on, and tension and lubricate it. Then I can try out the rear wheel drive.
- - -
It Works!
The rear wheel drive works fine. At high engine speed, it's not leisurely -- it really moves along.
* * *
Notes:
[1] The spark plug was likely replaced for no other reason than that spark plug replacement is the done thing when an engine becomes troublesome. If I had a nickel for every needless lawnmower spark plug replacement that's ever been done, I'd make Bill Gates look like a pauper.
I can easily imagine what likely happened with this old mower -- the engine got to behaving badly, the spark plug was replaced, the engine continued to behave badly, the mower was junked. I often saw a similar routine play out at the laser printer repair outfit where I used to work. A printer would begin to misbehave, a pickup roller would be replaced, the printer would continue to misbehave, the printer would be junked.
Both little scenarios are examples of what I call 'magic bullet' thinking -- the notion that years of wear and tear on a machine can be made to evaporate by a quick, cheap fix.
Machinery seldom breaks down in simple, clear-cut ways that will respond to quick fixes. Machinery deteriorates -- over the course of long service, every bit of a machine that's prone to wear and fouling wears and fouls. The result of that is seldom outright breakdown, but rather troublesome, erratic operation. The solution is patient, knowledgeable overhaul. That's labour-intensive, hence costly, hence rejected in favour of machine replacement.
[2] The chain is 1/2" pitch. (Pitch = roller-centre to roller-centre dimension.) Apart from that, roller chain specifications can be bewildering, and I won't even try to say which chain this is, exactly. Princess Auto sells new roller chain by 10' lengths. If ever you're buying roller chain, take the old chain with you to be certain of getting the right thing.
# # #
# # #