 How many times have you heard that phrase?
Every so often, I come up against an 'uneconomical to repair' item, and just for the sheer heck of it I say, "Bleep economics. I'm going to repair it anyway." This is a 'business-and-commerce-free' zone, after all, and I can adhere to my own notions of economy, warped though they may be. (Plus, I can't let a challenge like this go unanswered.)
- - -
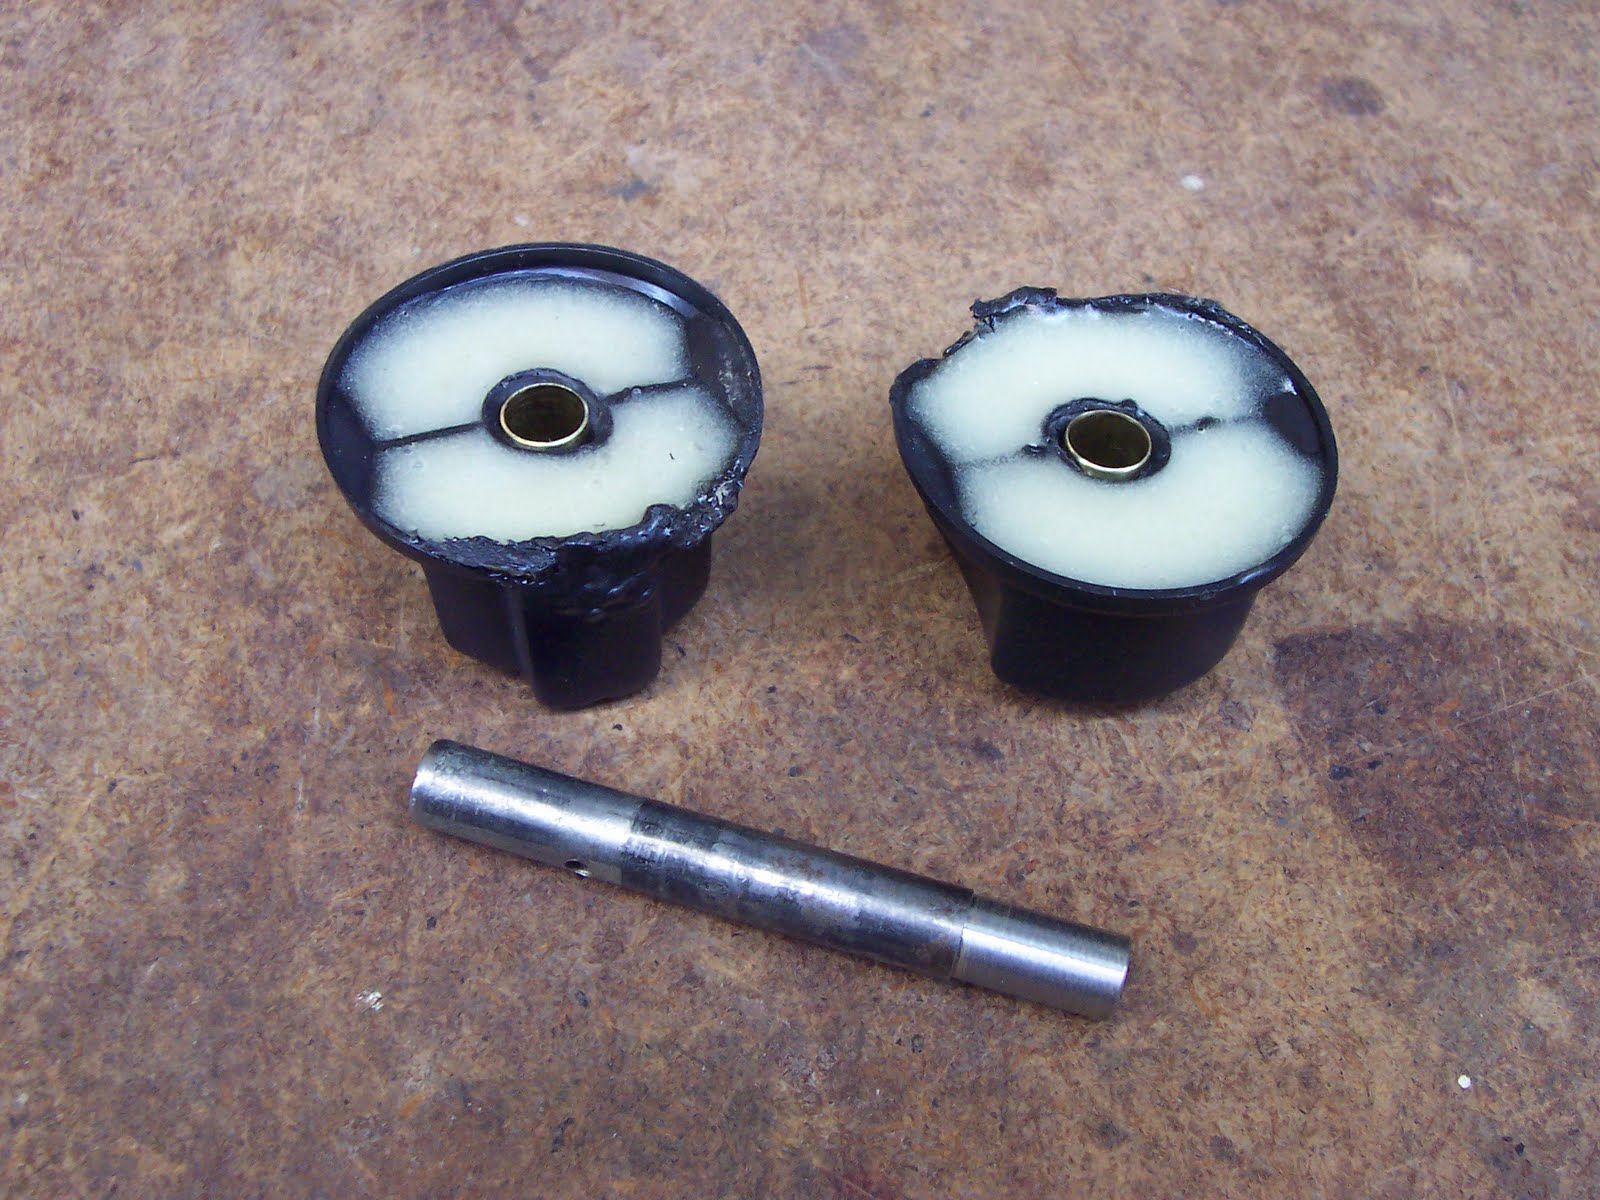
Pictured are the valve knobs from my barbeque. They've seen better days. The story of how they got to be in the state they're in is here.
Also in the shot is a length of 3/8" diameter hard brass tubing from the hobby shop that's going to figure in this.
First thing to be done is to wash away all the spider silk and grime from the things. Then I'll fill them with epoxy to lend them sufficient substance for what I have in mind.
- - -
Here's a knob all cleaned up and epoxy-filled.
 That central hole that used to fit over the valve stem is badly distorted. I have to bore it out to 3/8" diameter so I can sleeve it with the brass tubing. Then I'll have to add a set screw to secure the knob, since I'll have lost the flat that used to key the knob to the valve stem. Permit me to digress here to speak of brass tubing for a bit.
- - -
That length of tubing pictured above is one size out of a whole sequence of sizes from 1/16" diameter up to, I think, 5/8". (The manufacturer, K & S Engineering, has a web site that's a bit shy on product data. I couldn't find a listing of all the available sizes.)
The tubing's sizes go up in increments of 1/32". The wall thickness is 0.014", so each size of tubing 'telescopes' into the next size up. The valve stems on my barbeque are 11/32" diameter, so the 3/8" outside diameter brass tubing (just over 11/32" inside diameter) will fit them perfectly as a sleeve.
(As an aside, a supply of the full range of telescoping brass tubing sizes is a huge asset in the workshop. The stuff is incredibly useful and versatile.)
- - -
Boring out the knob's hole to 3/8" diameter will be a bit tricky. Several things are at work here to complicate the task:
a: The knob's shape doesn't lend itself to easily aligning squarely with the jaws of my drill press vise, or to being securely gripped.
b: The hole to be enlarged is irregular. A drill entering it will tend to be deflected oddly, and chatter and chew as it's starting in.
c: Twist drills are not rigid milling cutters. They're remarkably flexible things.
To deal with the last of those three items, I modified a worn-out 3/8" drill as in the following photo:
 I cut it short and reground it. I did the cutting with a 1 1/4" diameter reinforced Dremel cut-off wheel. It was not easy to cut. High speed steel is hard stuff.
The result is not an ideal drill. A twist drill's web gets quite thick up the length of it, so this would not be an easy-drilling drill. But the thick web won't be in play here since I'm only enlarging an existing hole. At least I'll have a more rigid drill.
Some inner tube rubber helped with getting a good grip on the knob with the vise. Here it is set up and in progress.
 It was a devil of a thing to get centred up. To help with that, I chucked a piece of 3/8" diameter tubing in place of the drill at first. That gave me a representative reference cylinder that was helpful for getting the work positioned.
It turned out remarkably well, and with a bonus -- the finished hole diameter was slightly undersize of 3/8", so I had an interference fit for the tubing. I must point out something about twist drills here.
Twist drills are not reamers. When a twist drill is used to enlarge a hole, the resulting hole will likely be slightly undersize. The effect is more pronounced in material that has some resilience to it, as was the case here. The effect can present a problem at times, but it can also be helpful when you're seeking a snug fit. In this instance, the effect gave me just the interference fit I needed. Here are the knobs with their brass sleeves installed.
 In the foreground is a sleeve installation tool I made on the lathe from a scrap of 3/8" diameter steel rod. A very nice job, if I do say so myself.
In the next photo are the finished knobs in place on their valve stems.
 I made two 10-24 x 1/2" set screws from the ends of regular screws. A relatively large, coarse thread like 10-24 was called for here because of the relatively soft material involved.
So, the barbeque can be back in business come spring; I just have to deal with the damaged paint on the control panel yet.
I like this sort of outcome, where no business and commerce whatsoever needed to be conducted to arrive at it.
- - -
Update -- TUESDAY, OCTOBER 13, 2015
It's happened again -- another BBQ flashback. The damage doesn't look quite so bad this time.

We'll see how well my repaired knobs stood up to this latest incident.
No comments:
Post a Comment